How To Execute The Perfect Barbell Row

Barbell rows are a pretty essential movement for building a strong back, and a strong back is often the foundation of a quality athlete. Is your row form on point?
Jayden Pollard is a passionate powerbuilder (powerlifting bodybuilder) with a background in strength training and sports like basketball and wrestling. He runs the fitness blog SHREDDIT, writing about various health and fitness-related topics. In this blog he outlines how to perform the barbell row plus some common mistakes.


Change the Way You Train
Do Barbell Rows for Massive Back Gains
Ah, the barbell row — one of the best back builders and a classic tried-and-true exercise. But too many people neglect the barbell row in favor of cable, dumbbell, or machine rows, due to lower back fatigue, or simply because it’s too hard.
Well, neglecting this exercise is a big mistake, especially if you struggle to build back thickness. (Personally, I attribute most of my back gains to the barbell row, even more so than pull-ups and deadlifts.)
Machines, cables, and even dumbbells can’t replicate the raw upper back strength you build with this movement. Barbell rows will give you that pit bull back. Big traps, thick upper and mid back, wide lats, and huge spinal erectors — a lot of muscle groups that many people neglect when trying to add mass.
When you add barbell rows into your training and execute them with proper technique, you’ll be pleasantly surprised with what it does to your physique.
Muscles Used in The Barbell Row
The prime movers of the bent-over barbell row, or the muscles that get hit the most during the movement, are:
- Lats
- Rhomboids
- Lower/Mid Traps
- Posterior (rear) Deltoids
Your lats, rhomboids, and traps will be doing most of the pulling here. At the top of the rep, you should be trying to squeeze your lats and rhomboids together as you pull up.
You will use your lower back, legs, and core to brace and stay upright during the exercise. Don’t be shocked if you have sore quads, hamstrings, or abs after performing this movement.
The barbell row is a movement that will expose your weaknesses, so be ready for that.
Performing The Bent Over Barbell Row
Setup
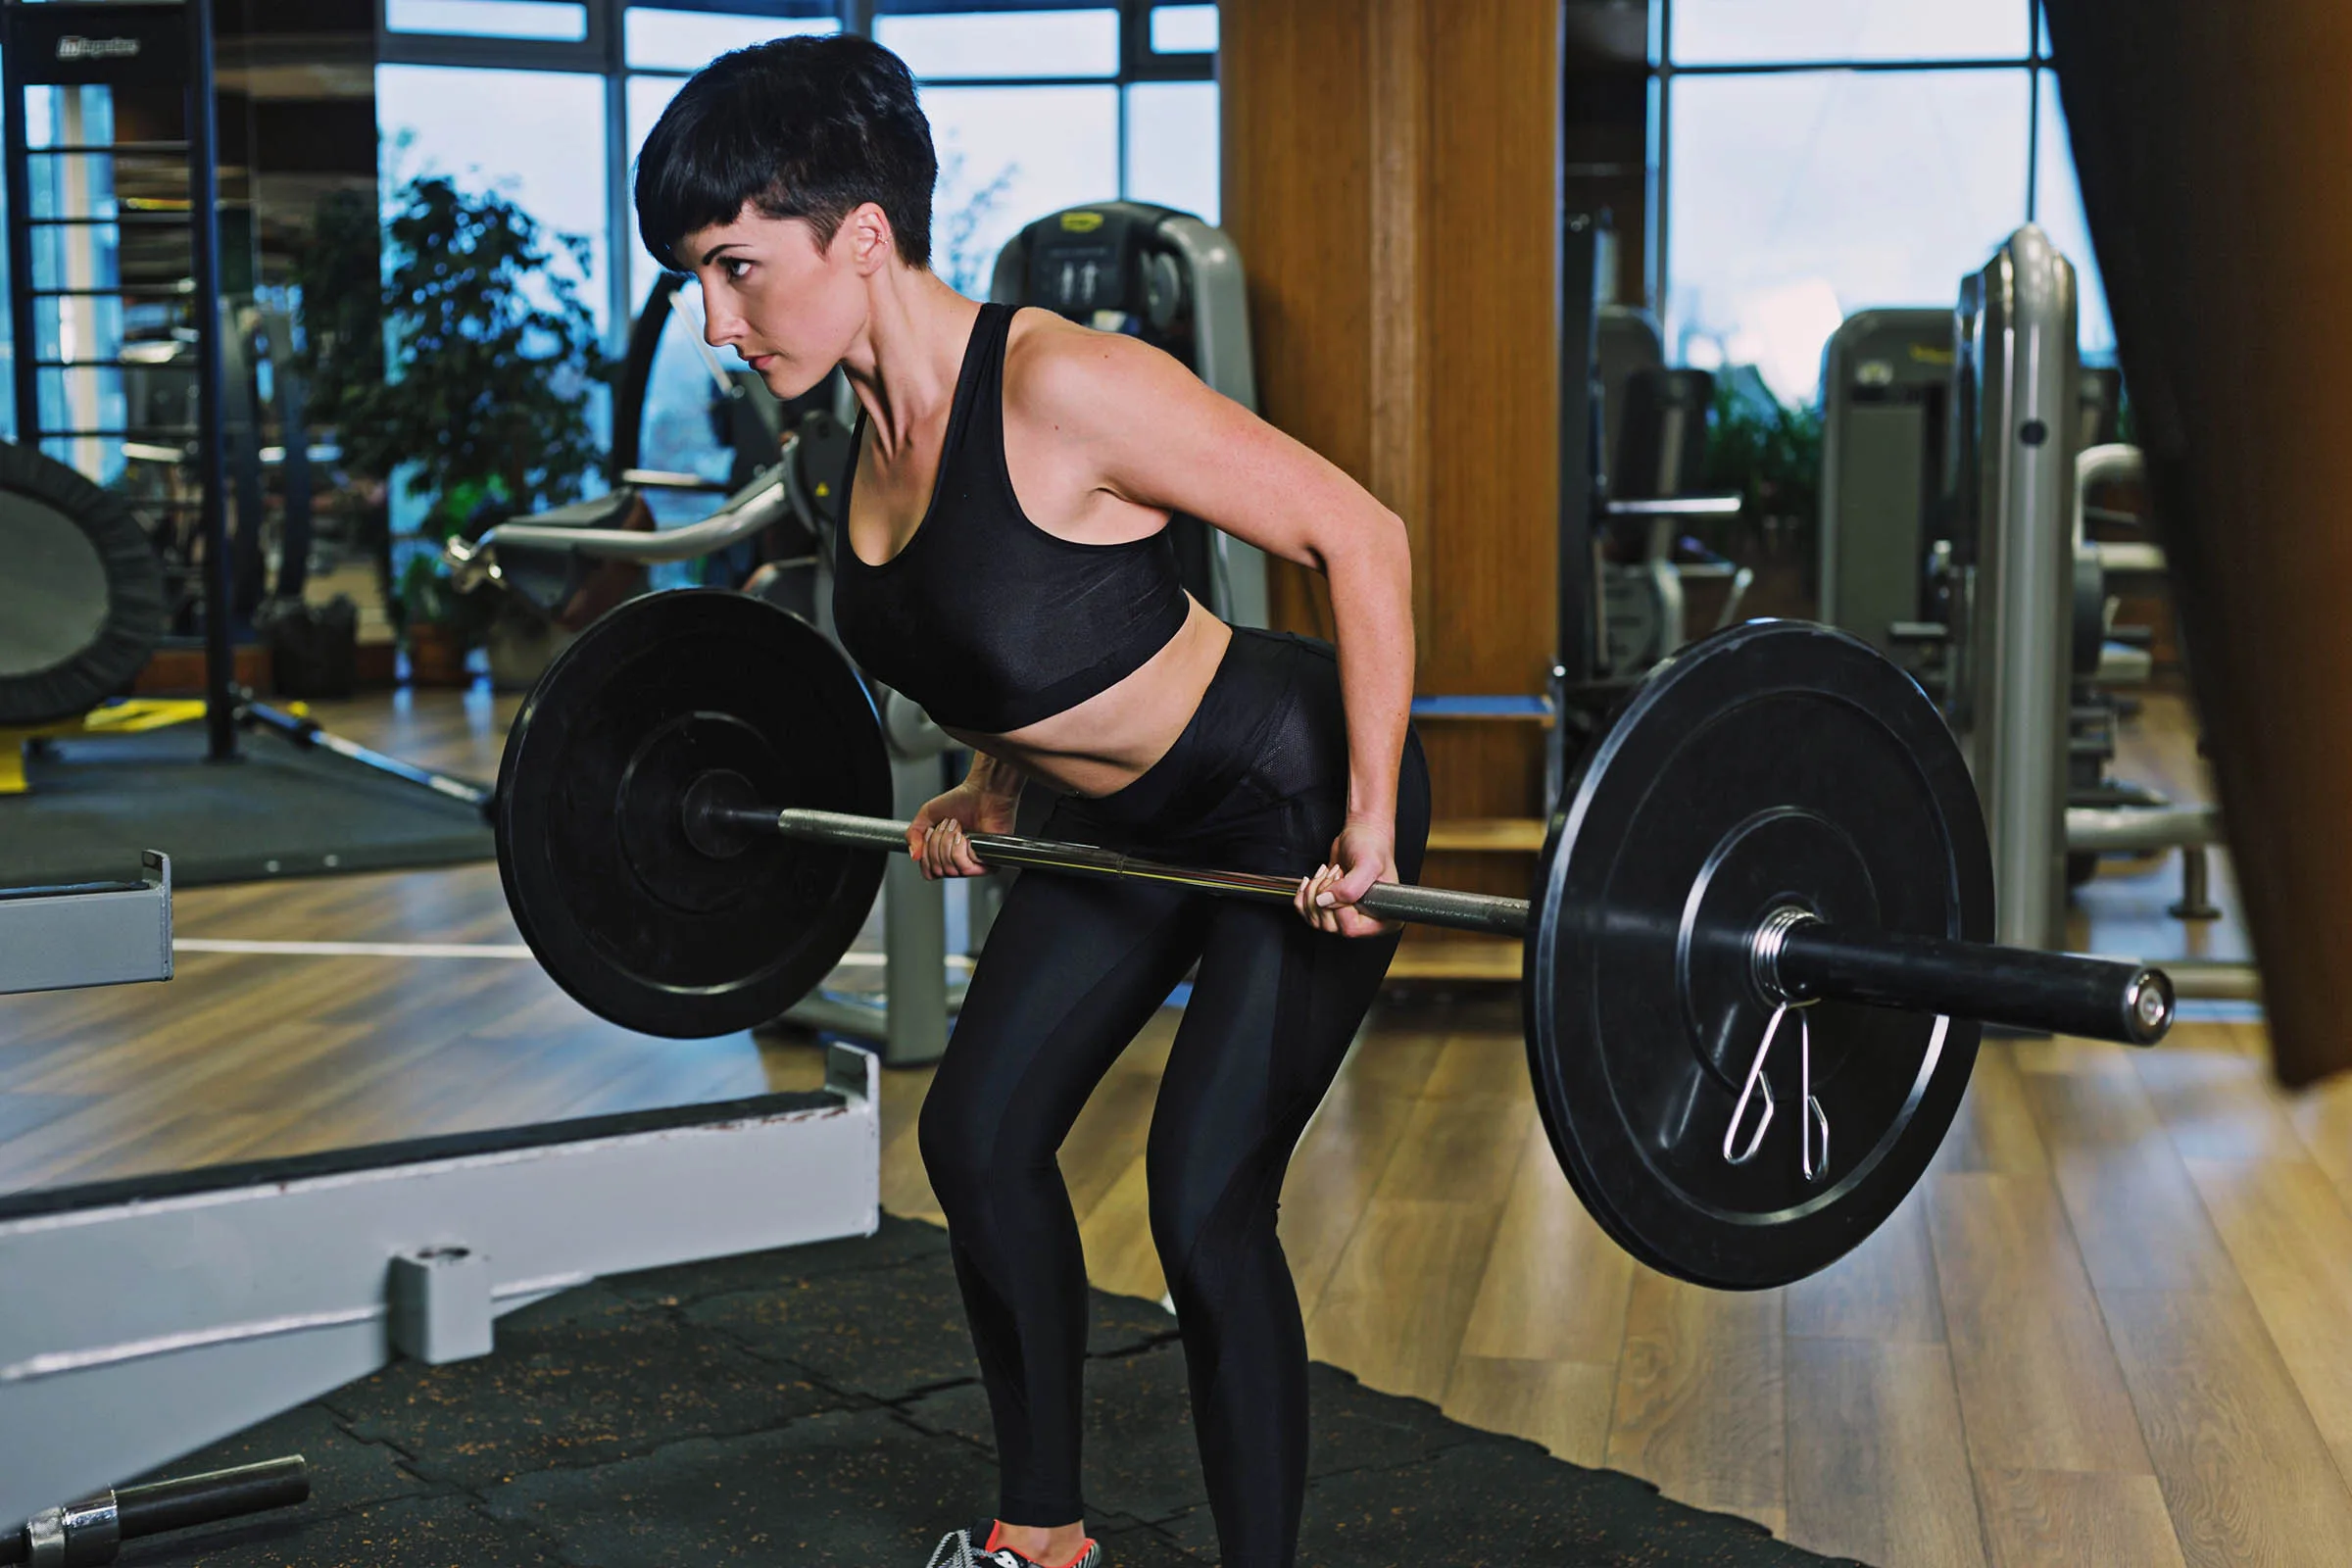
You’ll want to set this lift up like you do for a traditional deadlift. Some people like to do this lift off of the rack. I am not one of those people. This lift should be done off of the floor if you want to build real strength, just like a deadlift. Getting the bar over your midfoot is a key component of any heavy pulling movement, which is best achieved when the weight starts on the ground.
Approach the bar with your feet shoulder-width apart and try to get the bar in line with the middle of your foot. Once you have the proper foot position, get into the deadlifting starting position.
Your back should be at around 45-degree angle, with slightly bent knees, hips pulled back, and chest up. The position should feel tight and secure.
Now grip the barbell with a double overhand grip (you can also use straps or an underhand grip), take the slack out of the bar, squeeze your lats, and take a breath.
Pull
Pull the bar from the ground into your belly. Some people like to touch the bar to the ground at a dead stop, while others like to leave the bar hanging an inch or two in the air. I prefer to keep it in the air an inch or two as I am a taller individual, and I lose a bit of tightness when I bring the bar completely back to the ground. This is really the dealer’s choice.
Breathe in on the way up, and let that breath out once you return to the starting position. Don’t release the breath on the way down. The extra stability that this inhale brings is important for keeping stability throughout the entire movement.
These rows should be strict with little momentum used; these aren’t cheat rows.
Coach’s Tip: pull with your elbows, not your wrists. You’ll want to keep your wrists as straight as possible throughout the entire movement. If your wrists begin to curl despite your best efforts, that’s a sign that you’re lifting too heavy.
If you’re just starting out, aim for a 6-12 rep range, as you don’t want to go too heavy on this lift. Having good form is crucial for proper upper back activation. I recommend resting 3-5 minutes between sets, depending on your strength.
Novices rest 3:00
Intermediates rest 4:00
Advanced rest 5:00


Common Mistakes & How To Fix Them
Using Too Much Momentum
This is most common in beginners and novices, but intermediate and even advanced lifters are guilty of this as well.
The use of momentum occurs when one uses too much weight. It’s when a standard bent-over row turns into a cheat row, then usually by the end turns into a bent arm shrug. You start to swing the weight in order to get it up.
The bent-over barbell row should be a smooth/strict pull that almost resembles the seated cable row. You should be lifting with your lats and traps, not swinging your whole body around.
Curling Your Wrists
This one isn’t as obvious as the first one but is almost as detrimental. Curled wrists can be a sign that you are lifting too much weight. Your form might feel perfect, the stance, squeeze, and bar path, but if your wrists aren’t straight, you’re leaving some gains on the table.
Having curled wrists will quickly turn this into a grip exercise, as it puts more strain on your biceps and forearms.
Straightening your grip is a complete game (or should I gains) changer when it comes to the barbell row and rowing movements in general.
Knees Too Close To The Bar
Having your knees too close to the bar, just like the deadlift, will cause the bar to hit your knees or shins on the way down. If you’re lifting in shorts and using a considerable amount of weight, this could result in some pretty nasty knee and shin scrapes.
The scraping is a little annoying, but the main problem with this is the interruption to the set. Hitting the bar against your legs can alter the course of the set. It could cause you to lose your balance, it can shave a rep off of your set, or it can just cause you to lose your focus and balance.
You can fix this by putting an extra inch or two between you and the bar.
Find Your Perfect Training Plan
Sometimes all you need to reach your destination on your fitness journey is an expert guide. We've got you covered. Browse from thousands of programs for any goal and every type of athlete.
Try any programming subscription free for 7 days!
Related articles
Building Motivation: Strategies for Athletes & Coaches to Stay Inspired
How do you get your athletes (or yourself) to keep showing up to training consistently? Motivation drives every great athlete, but it doesn’t happen by chance. Whether you’re pushing yourself or coaching others, lasting motivation is the key to progress. Here’s how to...
Hammer Curls: Form & Variations for Bigger Biceps
Want thick, juicy biceps that pop out of your T-shirt? Then you should probably be doing more hammer curls. This curl variation shoots a powerful pump through your biceps and forearms that lead to big gains in a different way than traditional bicep curls.Written...
Romanian Deadlifts (RDLs): The Ultimate Hamstring Exercise for Posterior Chain Development
Struggle with weak hamstrings? Hips? Glutes? Your entire posterior chain? Join the club. In this blog, Coach Kyle gives his top advice on how to master the Romanian deadlift to fix your imbalances, reduce risk of injury, and strengthen your other big lifts.Written...


Join the community
Sign up for the latest training news and updates from TrainHeroic
For Coaches
Support
Made with love, sweat, protein isolate and hard work in Denver, CO
© 2023 TrainHeroic, Inc. All rights reserved.


