Automate a purchase conversion email for every program you sell in the TrainHeroic Marketplace
Coach Development | UncategorizedSend the perfect conversion email to new athletes who purchase your training program in the TrainHeroic Marketplace with our comprehansive guide.
We’ll discuss the importance of a good conversion email, content strategy, and give you step-by-step instructions to automate these emails like a pro using MailChimp, TrainHeroic, and Zapier.
// Sending the perfect conversion email
Picture this: you’re selling a training program in the TrainHeroic Marketplace. You’ve created a killer sales page using these guides and your sales are increasing as more and more athletes want to train using your programming.
You typically send a personalized email to your new clients to thank them for their business and let them know how to get started.
But with the recent influx of program sales, you haven’t been able to send your welcome emails promptly, or even at all. You’re afraid you’re not going to get future business from your new clients (upsell) because they aren’t hearing from you when they need you the most.
You’ve been working hard to grow your client base and sell more programs. But now that it’s happening, you don’t think you can keep up with the workload because this is only one of many revenue streams for you.
Has this happened to you?
If so, let us be the first to congratulate you on growing your business!
Whether this resonates with you or this sounds like a problem you’d like to have, we have a solution for you.
With the help of Zapier and Mailchimp, we will show you exactly how to automate welcome emails so the right information goes to the right person at the right time.
Whether it’s 2 AM or you’re on vacation, never again will you have to scramble to manually send a welcome email when a new client purchases your training program.
// Email copy and creative: building a welcome email that deepens the connection between your brand and your customer
Before we show you how to build this automation, what exactly should go in this email? What makes a great conversion email?
Think about the purpose of this email: to welcome your new client and make sure they have the necessary information to get to training.
Here are some ideas of what to include:
- What makes your program different from others?
- Is there anything they need to know about your specific program? Tips, advice, inspiration you want to share?
- Do you sell t-shirts or merch? Include information on how to purchase.
- Insert your Instagram handle or link to your blog to stay connected with you
- Let them know about any other programs you coach in the chance that the program they purchased isn’t the right fit for them.
- Want to upsell? Programs have an end date. Training communities are ongoing and include direct access to you, their coach. If you coach training communities in the TrainHeroic Marketplace include information about them in case that’s more of what they are looking for.
This guide will walk you through sending one email when an athlete makes a purchase. If you have additional info that’s important to share, feel free to add more emails to the sequence and send them on the following days. If you need help automating those additional emails, reference this Zapier guide.
Now that we’ve talked strategy, let’s build the automation using Zapier & Mailchimp.
Build and design your email
Below, we’re going to lay out recommended email topics & suggested copy. As you read through, begin building your email template in MailChimp. If you’re starting from scratch and need help getting started with templates, follow this MailChimp guide.
Use our template as a starting point with this link.
You’ll need a Mailchimp account to access the template. Don’t forget to edit all links including the social buttons in the footer.
// creating email automation with TrainHeroic, Zapier, and MailChimp
After your email template is built, you’ll need to create a tag that ensures the email is sent to the right people.
If you sell multiple programs in the TrainHeroic Marketplace, it’s important to identify which program was purchased in Mailchimp so you can send a customized email and message. Even if you only sell one program currently, following this first step will have you set up to sell additional programs in the future. To do this, we need to create a custom field in Mailchimp so we can send in the program name.
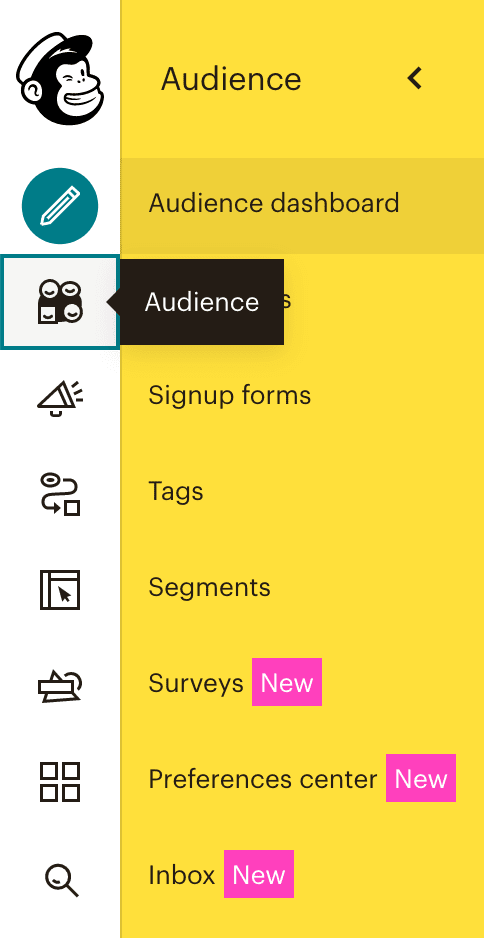
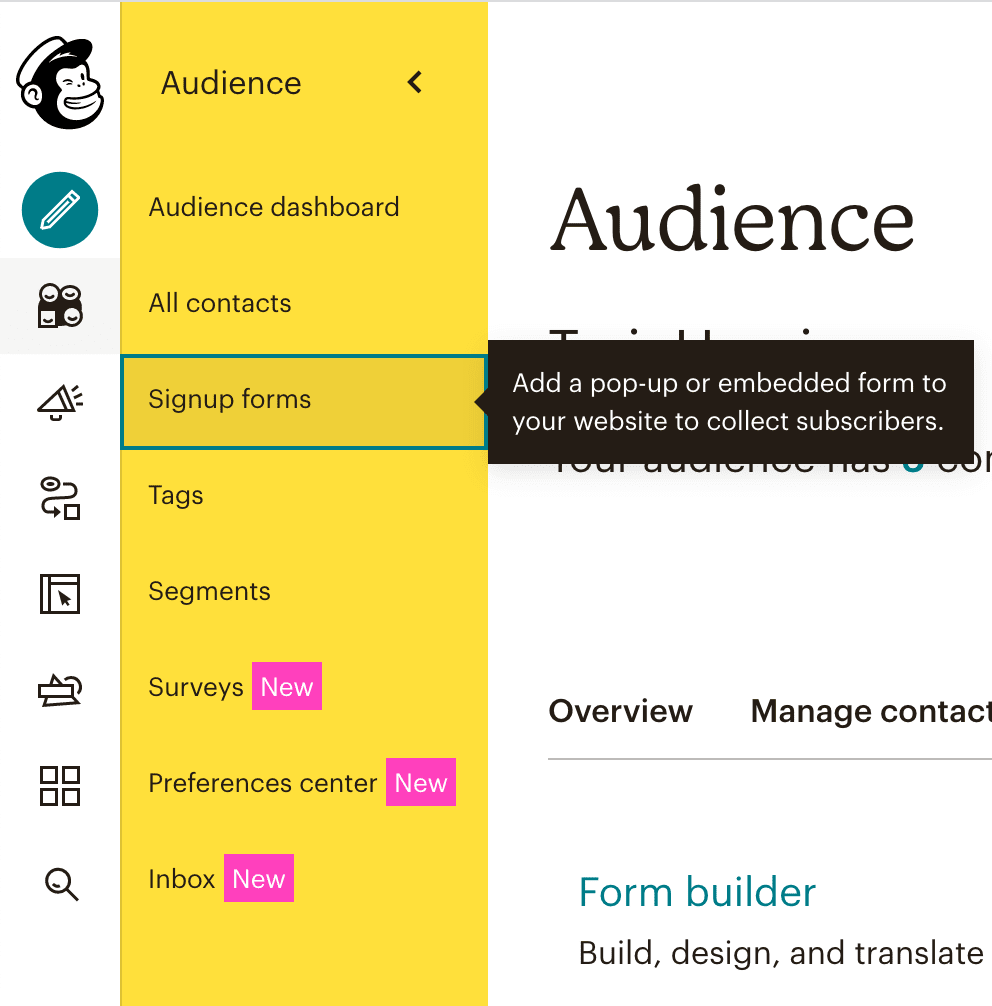
- Click Audience from the left-hand menu then Signup forms


2. Locate Form builder and hit Select


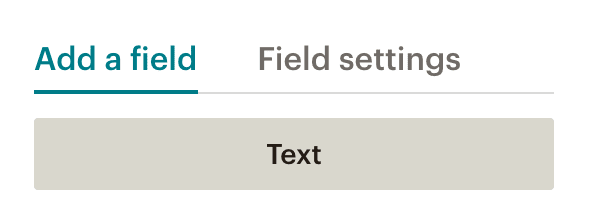
- On the right-hand side, locate Add a field then select Text

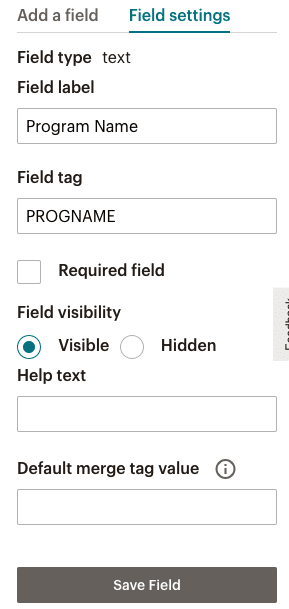
4. Name the field label. We’re going to use Program Name.
Using a Field tag allows you to pull an athlete’s program name into the email copy for additional personalization. We used PROGNAME (be aware of a character limit) which we can be easily referenced in emails.
Once you’ve filled in both of those fields, select Save Field.

5. Now, select All Contacts from the left-hand menu. When viewing all contacts, you will notice a new column labeled Program Name.
Once you’ve filled in both of those fields, select Save Field.


Later in this guide, we will show you how to send Program Name into Mailchimp from Zapier.
Create Tags
- To get started, select Audience in the left navigation then Tags.
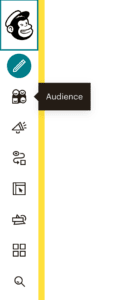

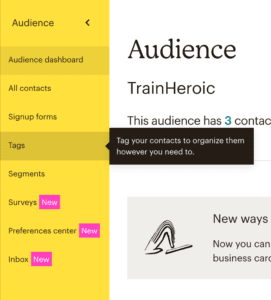


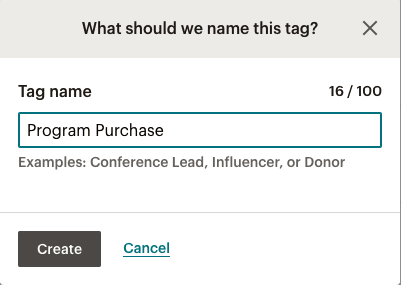
3. Give your tag a name. We are going to name ours Program Purchase. Then select Create.

Creating your automated campaign
Now that you created your Program Purchase tag, you’re ready to set up the automated email campaign.
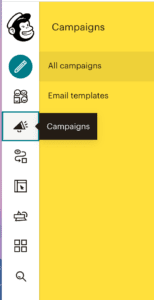

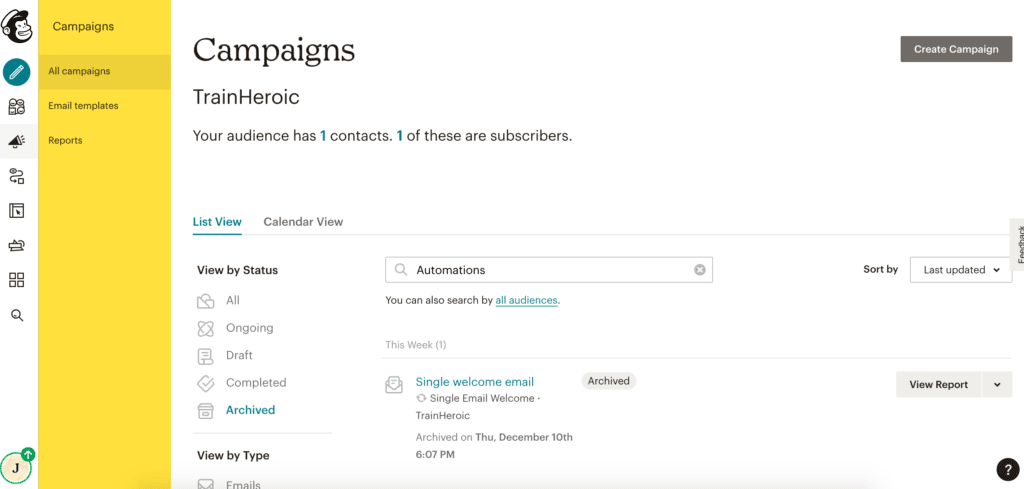

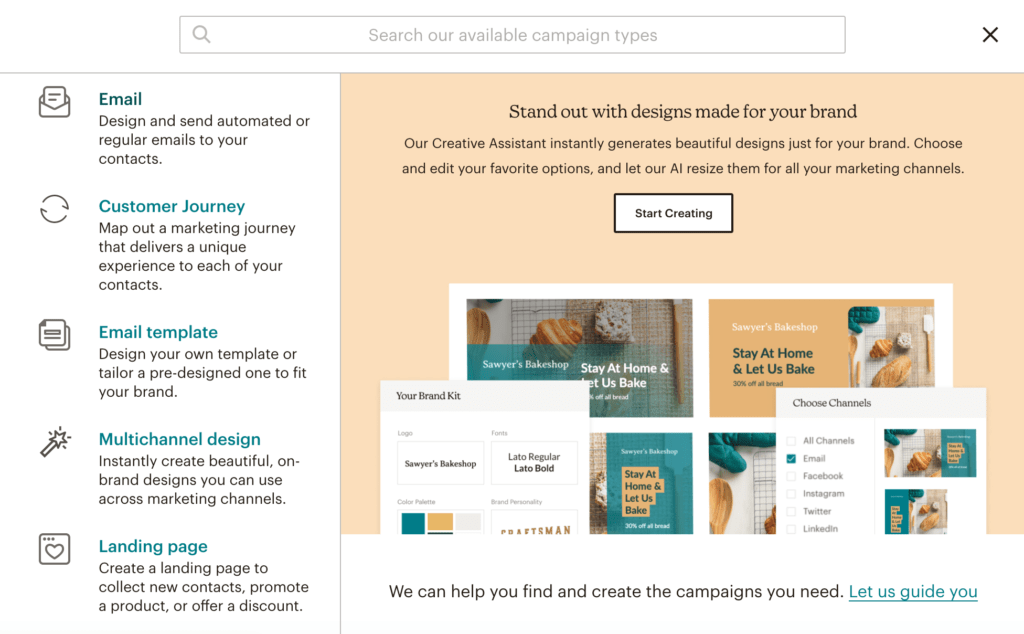

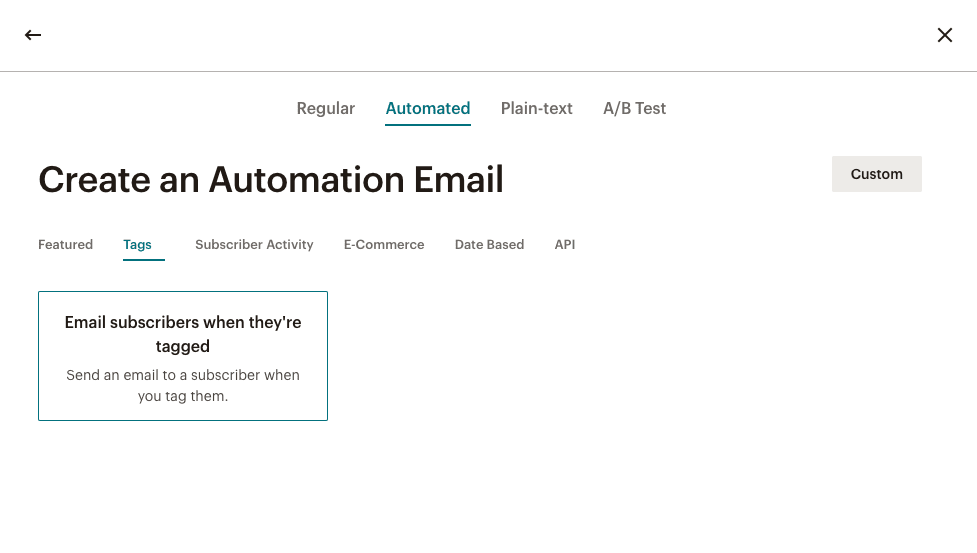

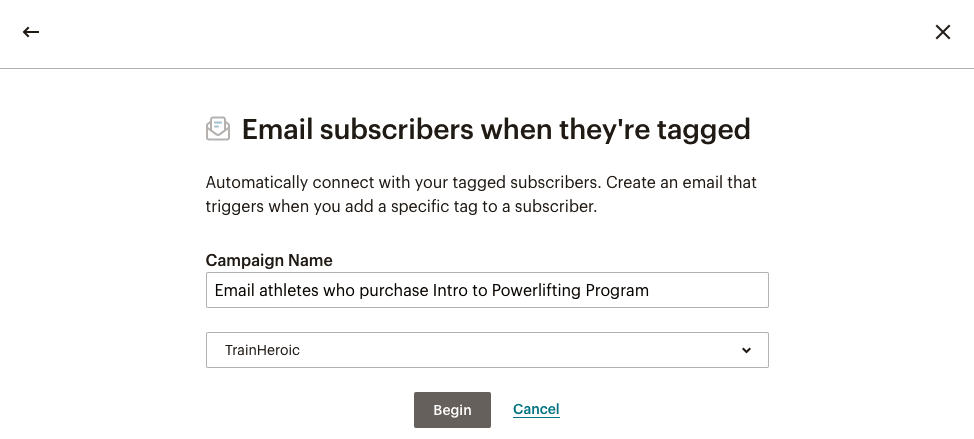

6. Next, select Edit next to Please select a tag.
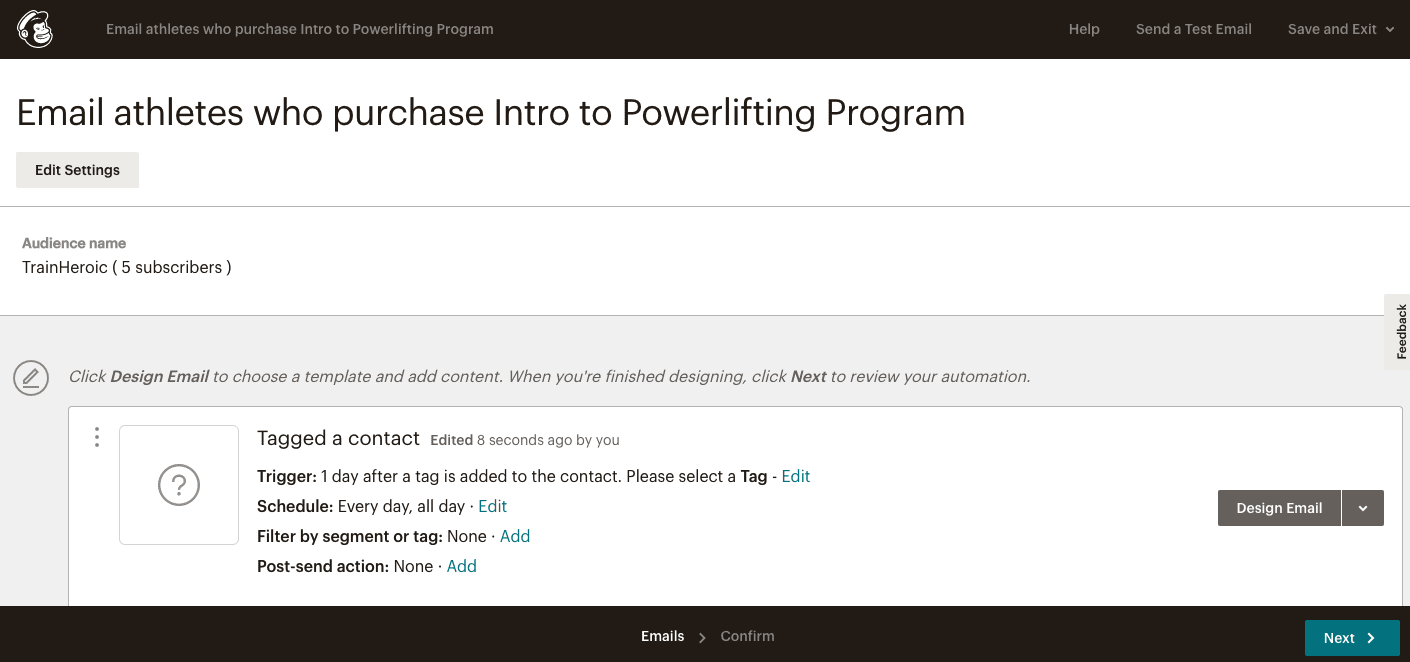

7. Edit the following settings:
- Change the delay to Immediately so the email sends promptly after a purchase
- Under Settings, select the tag you just created: Program Purchase. This will ensure that only athletes who have that tag receive this email campaign
Select Update Trigger when done


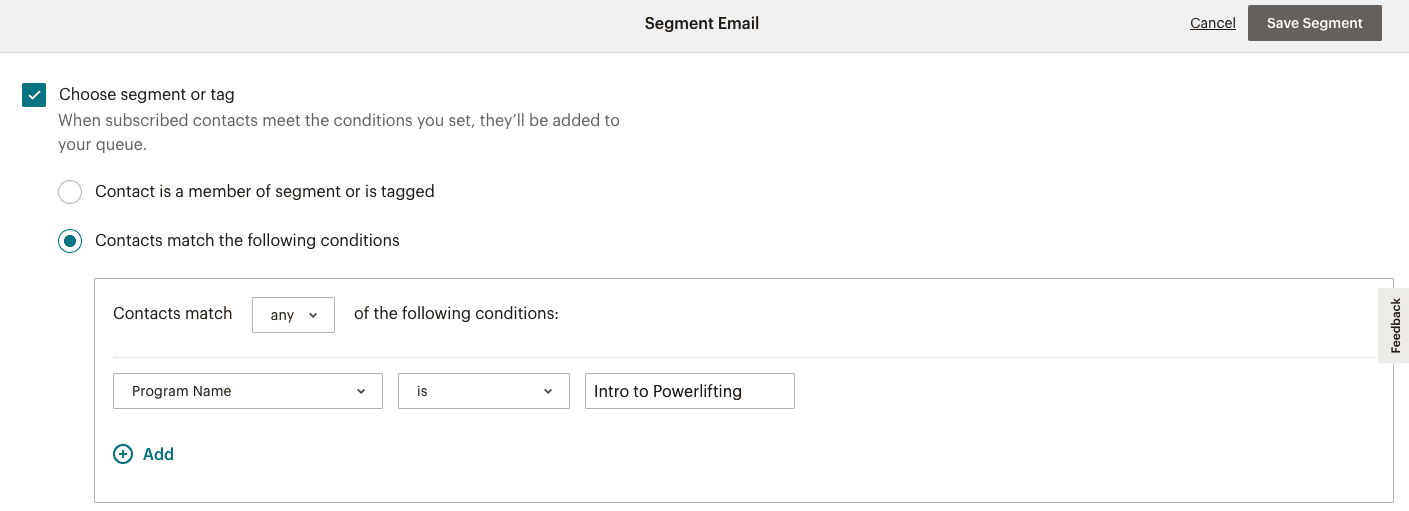
8. Remember in the beginning when we created the Program Name field in Mailchimp? Here is where we add a filter to reference the program name. For Doug’s Gym, this guarantees that the email in this workflow will only be sent to athletes who purchase the Intro to Powerlifting program.
Select Add next to Filter by segment or tag.
Check the box then select Contacts match the following conditions


9. Select the dropdown and locate the custom field you previously created: Program Name. Then type in the name of your program. Make sure spelling and capitalization are correct or else the filter may not work properly.
When finished, select Save Segment in the top right corner.

Adding email templates to your campaign
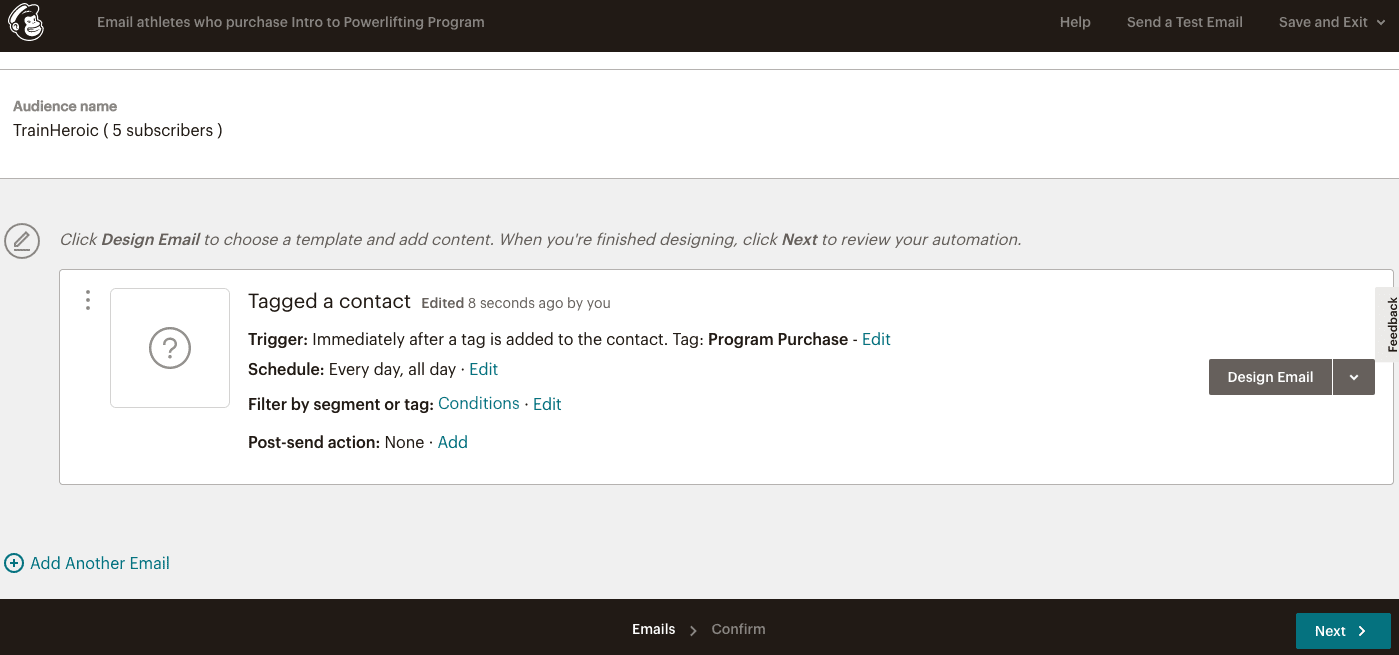
- Next, you are ready to select your email template. Select Design Email.

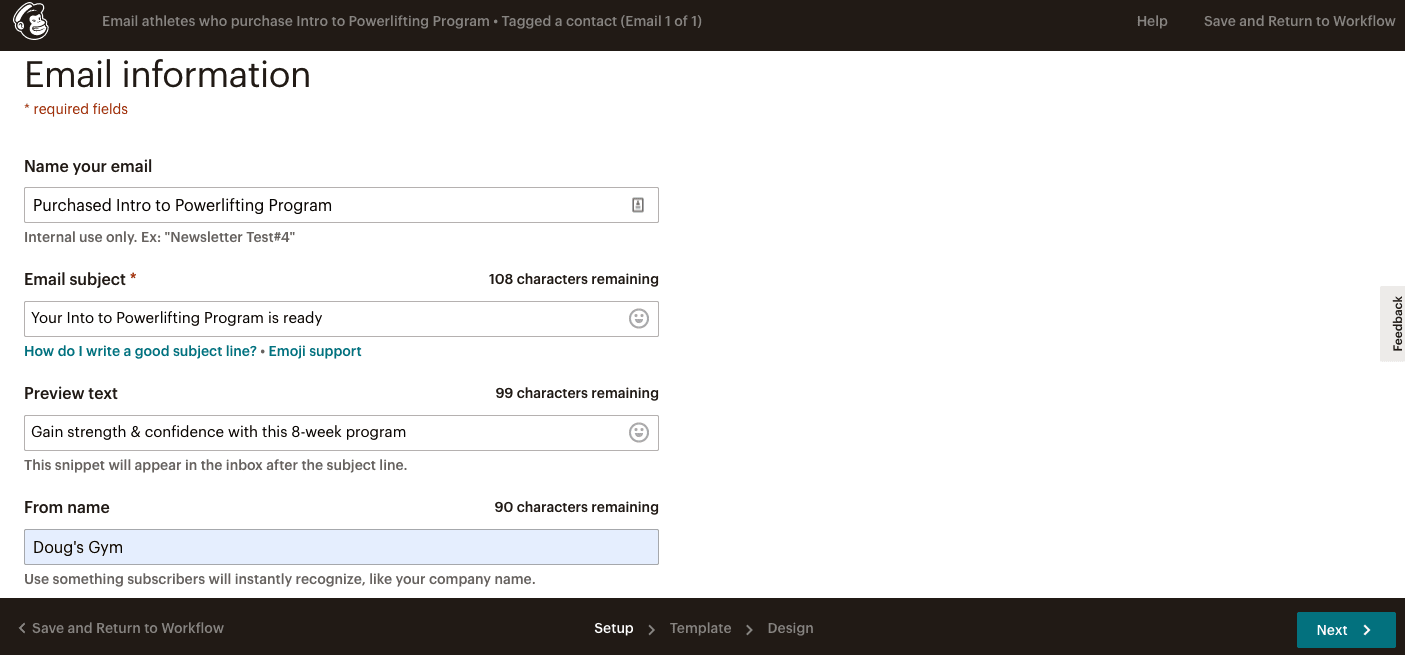
2.Give this email a name and fill in your desired email subject, preview text, from name, and from email address. Then hit Next.

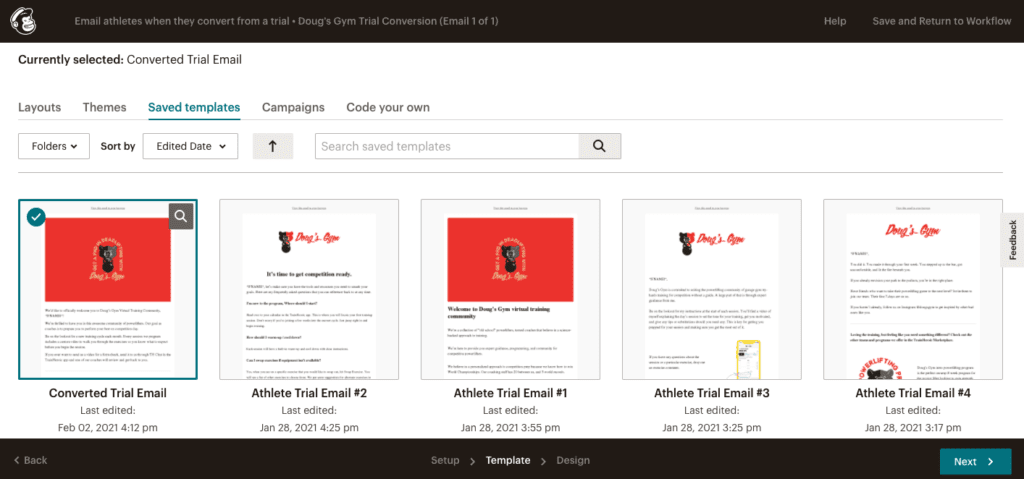
3. Click on the Saved Templates tab, find your desired template, then hit Next.

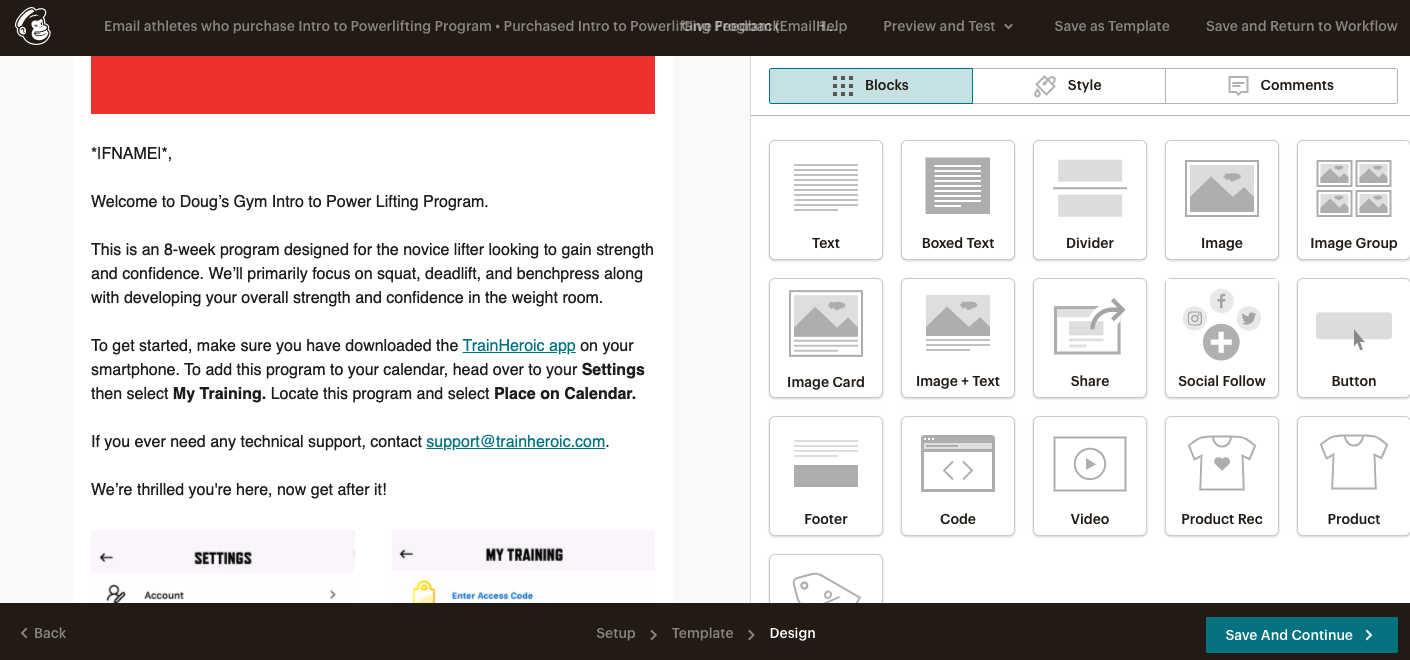
4. Review your template, make any necessary changes, then select Save and Continue when done.

5. Now we have set the timing, identified the program purchase tag, added a program name filter, and selected our email template.
Since this campaign consists of one email, we’re done with the setup. If you would like to send additional emails in this series, select Add Another Email and follow the same steps.
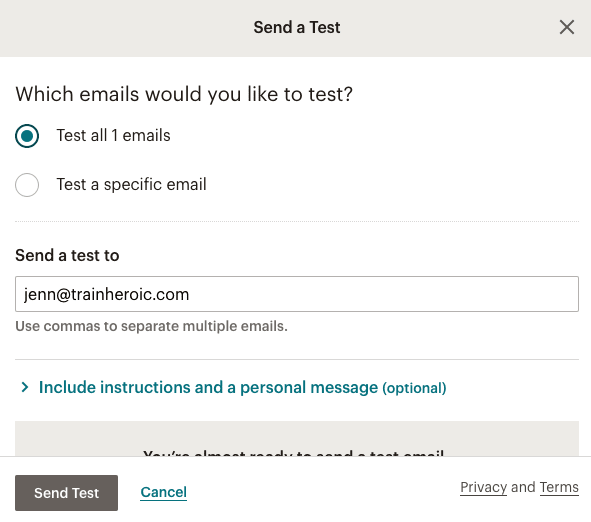
Go ahead and select Send a Test Email in the top right corner so you can see what it looks like in your inbox. Test emails can sometimes end up in spam so if you don’t see it right away, check your spam filter.

6. When you’re happy with your email and ready to launch, select Next.
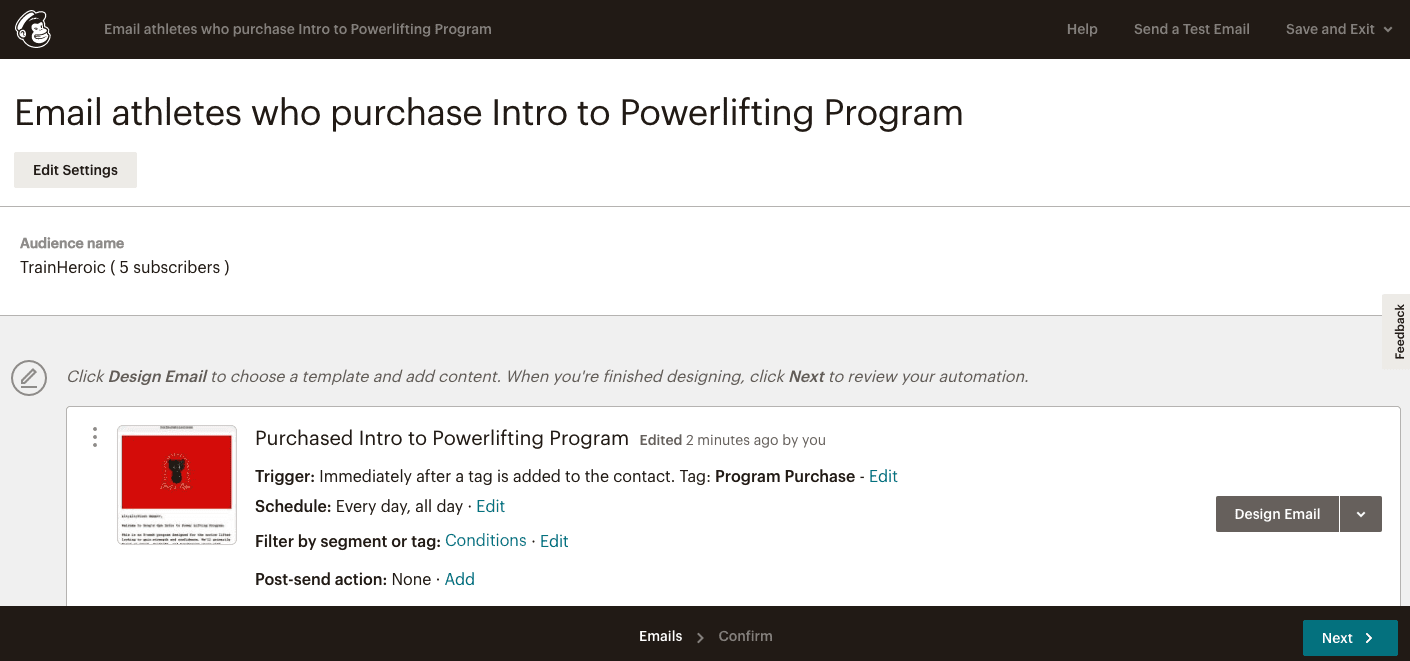

7. You’ll see an overview of the campaign you just built. Give it a once over and when you’re ready to launch, select Start Sending.
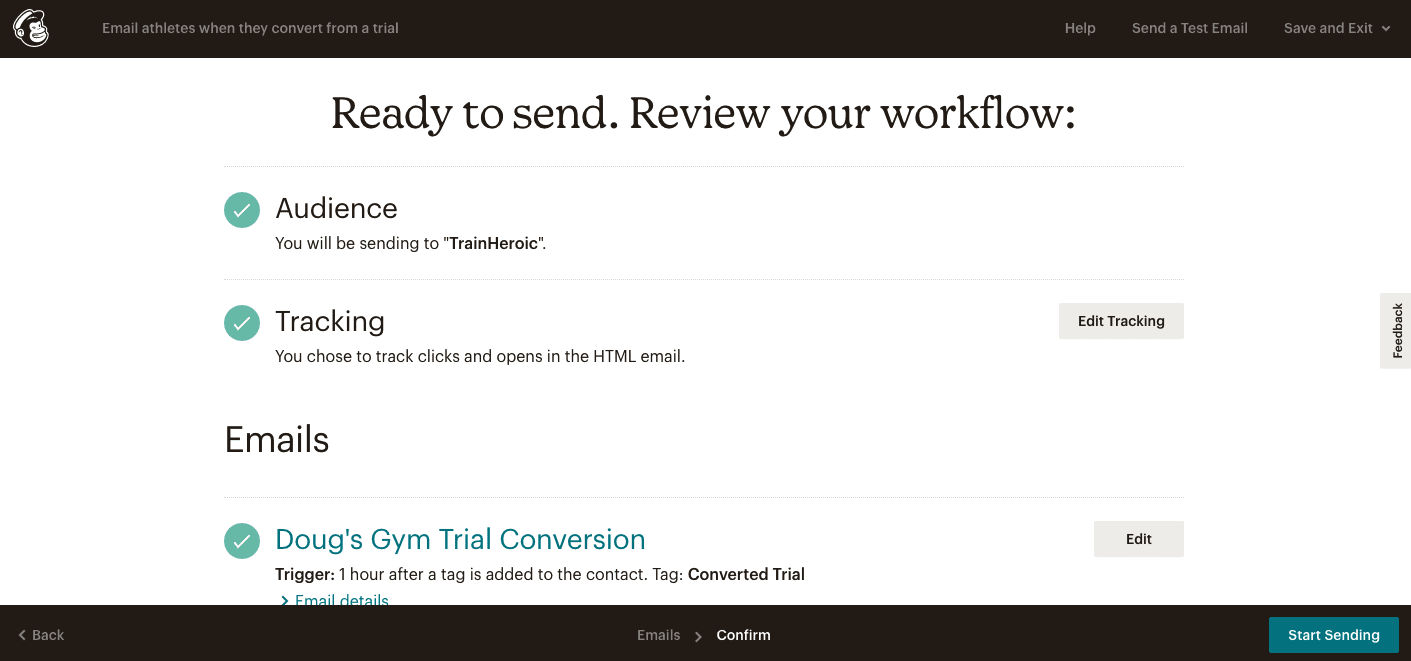

8. When you view your campaigns in the Campaigns tab, you will see that this campaign is now labeled as Sending.


Now, anytime a Program Purchase tag is added to a user, this email campaign will trigger. Only athletes that have the Program Name “Intro to Powerlifting” will complete the workflow.
// connecting zapier, trainheroic, and mailchimp
Now that your campaign is actively sending in Mailchimp, let’s automate it through Zapier.
Head to the TrainHeroic Integration page in Zapier.
Scroll down on the page and locate the section labeled Connect TrainHeroic to 3,000+ Apps. This is where you will find our pre-built templates to help you connect supported apps even faster.
Select Try it next to the template named “Send Mailchimp welcome emails for new program sales in TrainHeroic”
Only use this template if you are using Mailchimp as your email provider. If you’re using a different email service provider, you’ll have to make a new zap and start from scratch.


2. Next, in the bottom left corner, select Go to Advanced Mode. This step is important so we can configure an additional setting for Mailchimp.
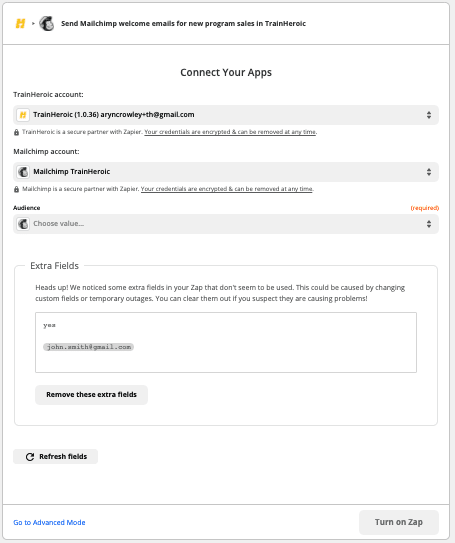

3. Begin by hovering over the trigger and selecting Edit.


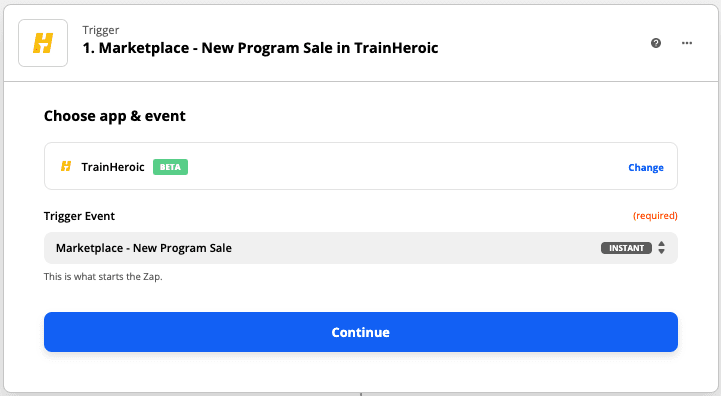
4. Under the Choose app & event dropdown, you’ll notice that the app (TrainHeroic) and the trigger (Marketplace – New Program Sale) have already been selected because we started with a template. Simply select Continue.

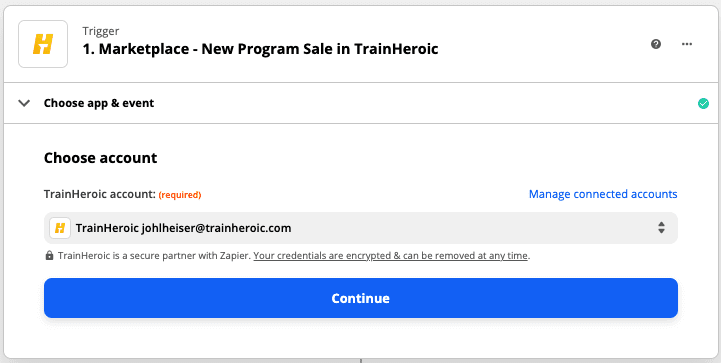
5. Next, select your TrainHeroic account. Then hit Continue.
If you haven’t previously connected your TrainHeroic account, you will be prompted to log in.

6. Next, select Test trigger.
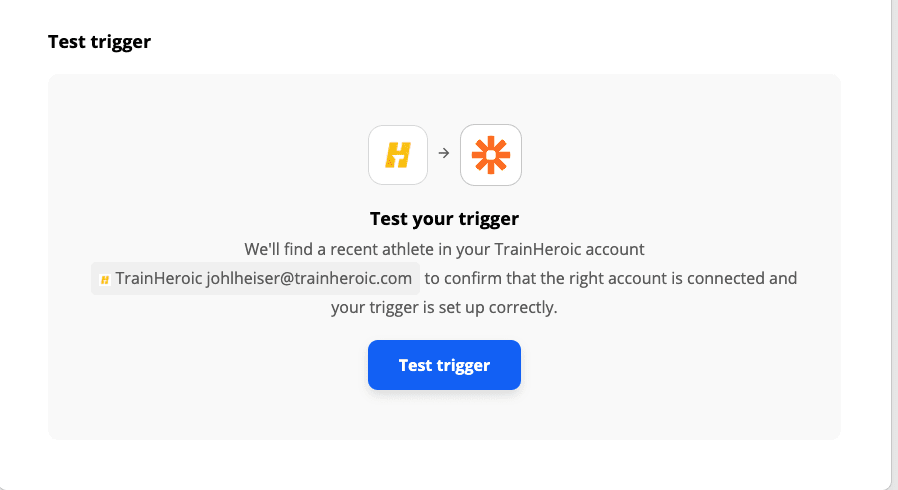

7. Next, Zapier will search for an athlete on your team to be used for testing. We recommend choosing yourself. That way, you will be on the receiving end of emails during testing and one of your actual athletes will not receive an email out of context. Once identified select Continue.
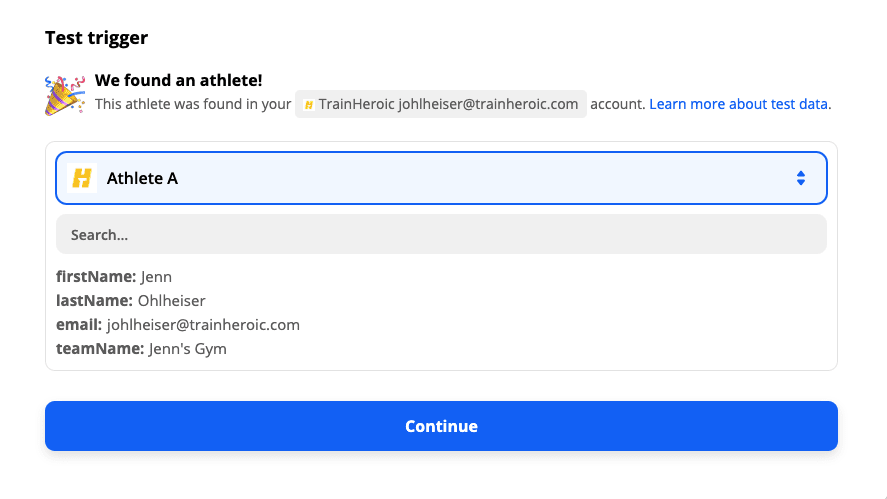

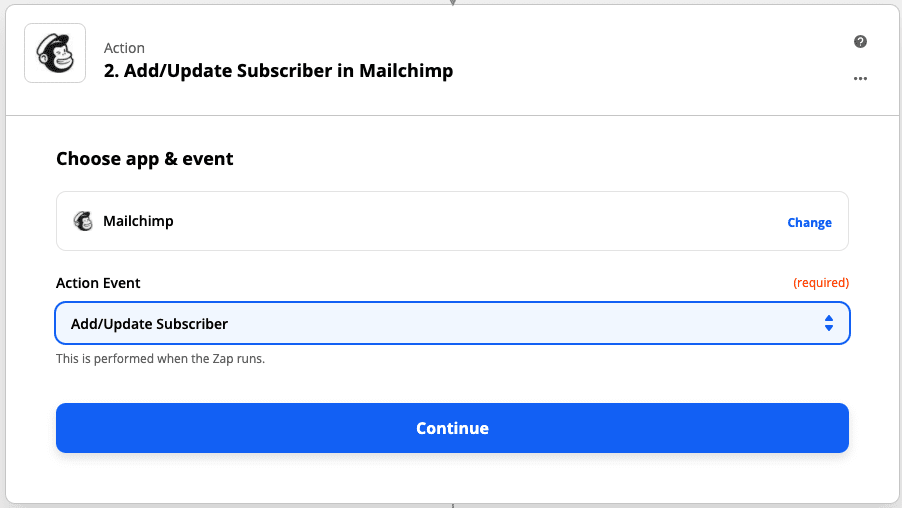
7. Now that your TrainHeroic trigger is set, let’s set up Mailchimp.
Since we started with a template, the app and action have already been selected for you. Select Continue.

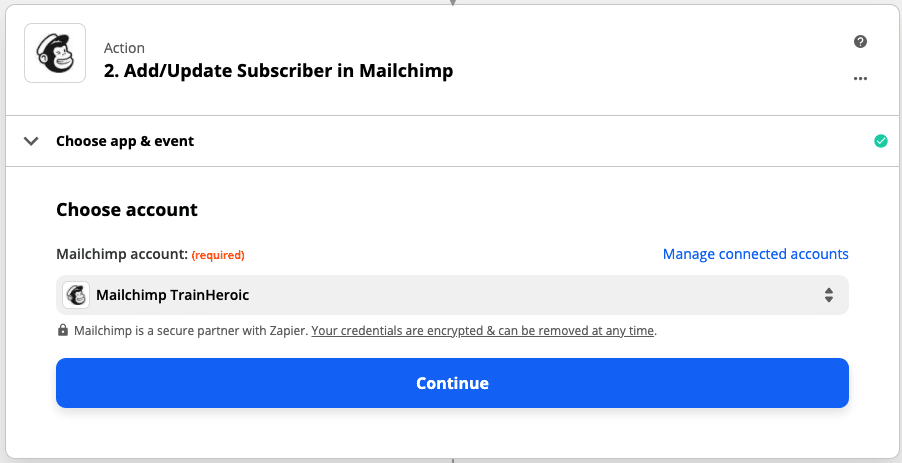
8. Next, connect to your Mailchimp account. Then hit Continue.

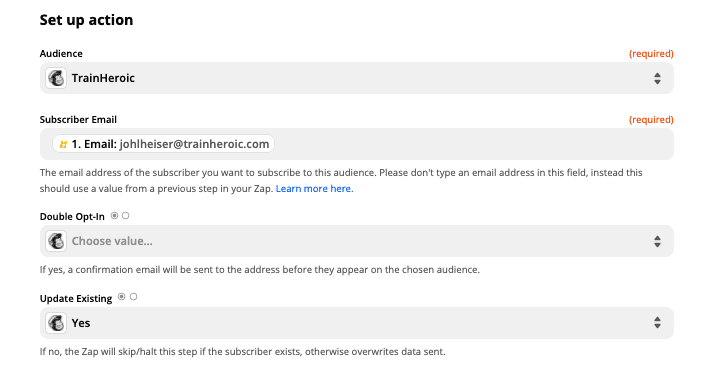
10. To set up your action, fill in the following fields:
- Audience: Select your Mailchimp audience
- Subscriber Email: Grab your test athlete’s email from the dropdown
- Update Existing: Make sure this says Yes
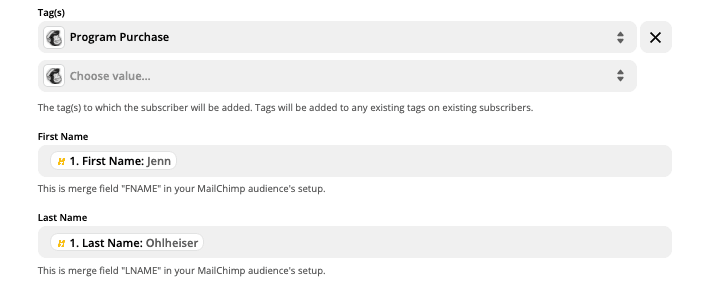
- Tag(s): Select your Program Purchase tag from the dropdown. (This is how the tag is assigned to the athlete)
- First Name: Select your test athlete’s first name from the dropdown
- Last Name: Select your test athlete’s last name from the dropdown
- Program Name: Select your test athlete’s program name from the dropdown. (This is how you identify who is training on what program)
- Select Continue when done



11. Now you’re ready to test the action you set up. Hit Test & Review.
You should receive a green banner indicating a subscriber was successfully sent to Mailchimp.


12. Before turning on the zap, let’s look at what was just happened in Mailchimp.
In Mailchimp, click on Audience then All Contacts. You should see the user and their associated data that Zapier just sent in, including the Program Purchased tag.


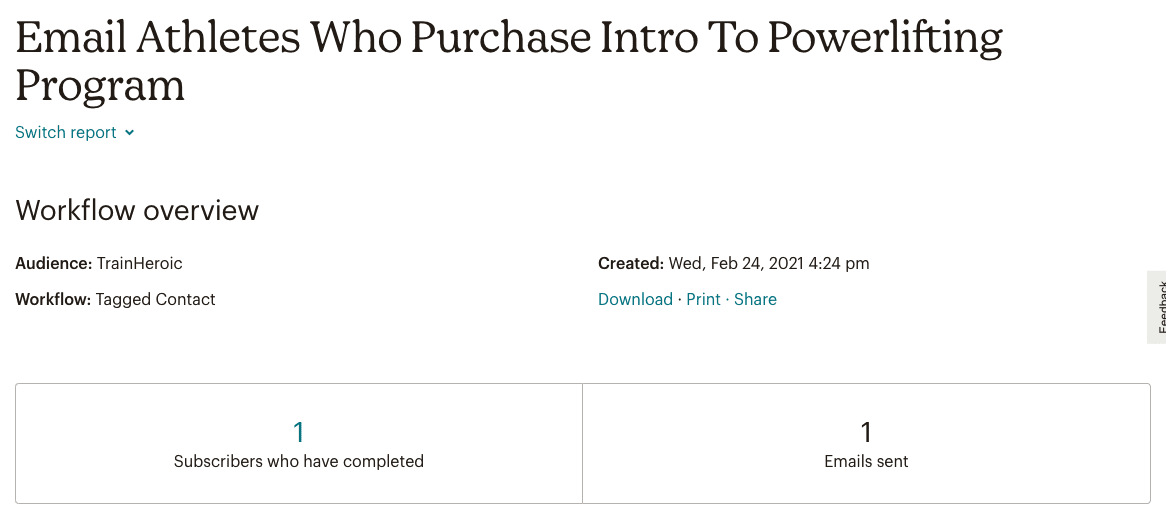
13. Now, head over to this campaign in the Campaigns tab. Since this email is set up to send immediately after a program purchase, you’ll see that this campaign has already been sent to one subscriber. If you were the test user, you’ll see the email in your inbox.
If you’re not seeing that the email sent, remember the filters we added when setting up the campaign. The tag AND program name in your campaign settings need to exactly match the subscriber’s profile that was used in testing.

14. Now that we confirmed the automation is properly working, head back to Zapier and select Turn on Zap to launch.


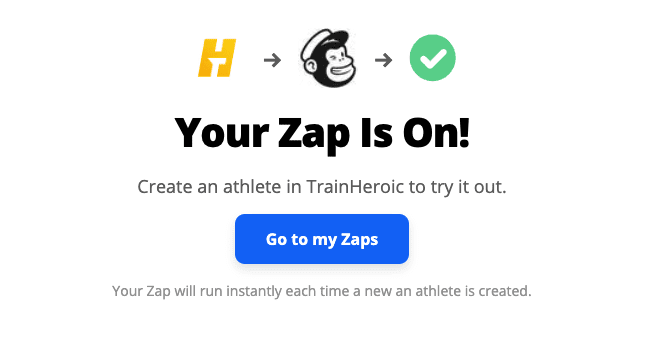
15. You’ll receive a confirmation message letting you know that the zap is turned on

READY TO TRY TRAINHEROIC?
Our powerful platform connects coaches and athletes from across the world. Whether you are a coach or trainer looking to provide a better experience for your clients, or you’re an athlete looking for expert programming, click below to get started.
Want more training content?
More coaches and athletes than ever are reading the TrainHeroic blog, and it’s our mission to support them with the best training & coaching content. If you found this article useful, please take a moment to share it on social media, engage with the author, and link to this article on your own blog or any forums you post on.
Be Your Best,
TrainHeroic Content Team
HEROIC SOCIAL
HEROIC SOCIAL
TRAINING LAB
Access the latest articles, reviews, and case studies from the top strength and conditioning minds in the TH Training Lab


